TPG Has a great offer at present for new subscribers to the Fibre To The Building (FTTB) here at Waves Redcliffe. The first six months are Free. Yes $0 per month. You only pay $10 for a modem/router delivery.
Click the image to see the TPG site where this offer is available. You will need to pay a $10 delivery fee for a new WiFi modem they will supply.
As more units get connected to the TPG FTTB, we will possibly have the fibre connection upgraded to be capable of 500 Mbps, but for now the maximum available speed at Waves is 100 Mbps. And that’s plenty fast enough.
You may be locked into a contract with your existing internet provider
You may be using an email address bundled with your existing NBN provider.
You may have an existing Mobile phone bundled with your existing NBN provider
You may be getting some other bundle add-ons from your existing NBN provide
Another thing to consider is your use of a “landline” phone number. The packages offered by TPG offer a new phone number, and differing levels of included calls, from pay-as-you-go to included. If you want to retain the landline number you may currently use, then the number can be “ported” across to TPG in lieu of getting a fresh number. To port the number to TPG, you will need to speak to their Sales Dept on 13 14 23
If you only use a mobile phone, then the free included phone line with the TPG-FTTB packages may be ignored.
DISCOUNT COUPONS
There is also a secret TPG Coupon you may be able to use that will waive your first month charge.
The coupon to try is FTTBFREE1 note: coupon may have expired
If you are an iiNet NBN customer, then you can sign up with them. They have a promo code at present of ULTRA6 for 6 months @ $79.99. This may be only for new iiNet customers – not sure…
Due to a large area of balcony tiles tenting a few weeks ago, and an inspection by a Tiler to assess the best option for repair, we opted to do a complete retile. Our unit is on the North of Waves and gets significant sun in the winter. Tiles expand more than the concrete slab beneath and they become un-stuck. The unit directly below us had the same issue a few years ago and had to do a complete retile of their balcony.
We found a nice grey replacement tile at Tile Merchants, in Virginia. Size is 450mm square. The colour is slightly darker than the original tiles, and very close to the shale-grey used around the Waves building.
Step one was to have the air conditioner disconnected and stored away from the balcony. This proved more costly than anticipated, but was necessary.
Then we had to clear the balcony of all our furniture and plants and storage boxes. Luckily we had room in our parking bay for some of this temporary relocation of “stuff”.
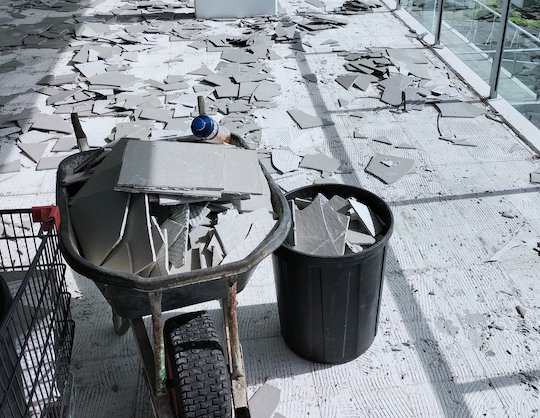
The start day arrived and we had a skip bin delivered to get rid of the old tiles and dust. This was an extra expense we were advised of as we had to organise the bin.
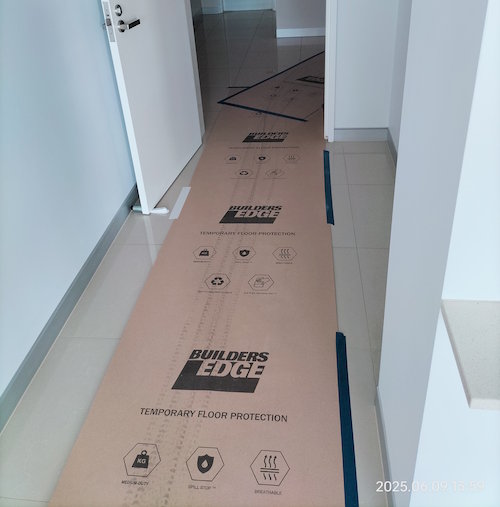
Having previously had bathroom renovations, we were mindful of protecting our flooring. We found a roll of temporary floor protection at Bunnings. We had a path from the lift to the balcony doors.
Jack hammering started about 8:00am on Monday. By about 11am all the tiles had been lifted. The crew left that afternoon and cleaned up the tiles the next morning and dumped them in the skip bin.
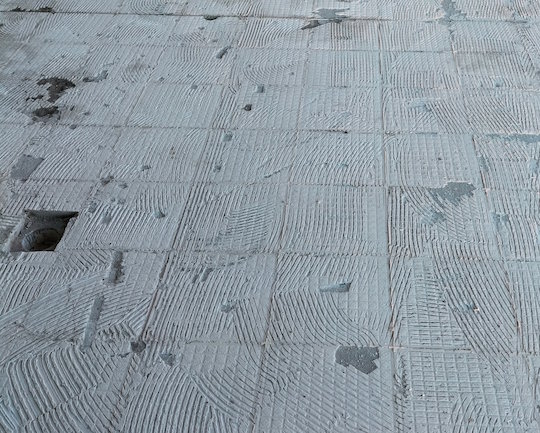
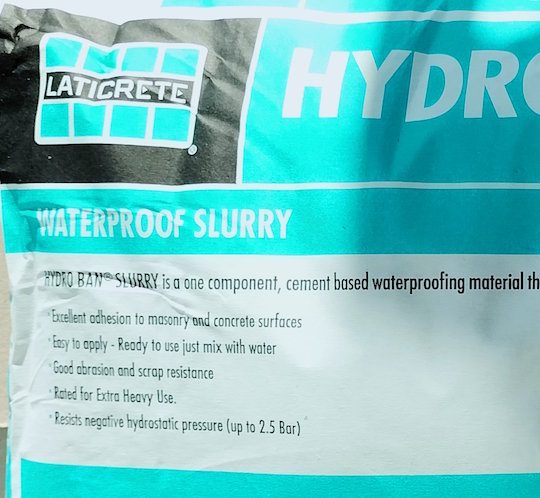
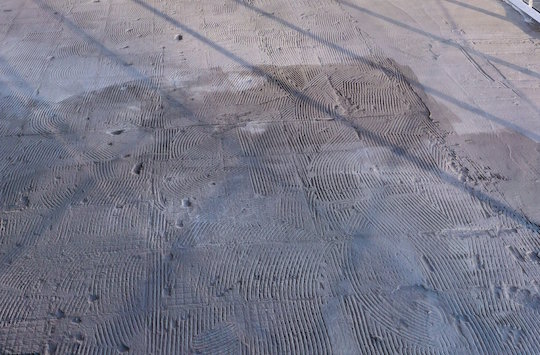
Next stage was to sweep the area ready for grinding. They only ground back to the glue/screed layers ready for levelling and application of waterproofing. Two applications of waterproofing were applied over two days using “Hydra Ban Slurry”.
The waterproofing was done with 2 coats of Hydra Ban Slurry. It looked very effective once it had soaked in and dried.
Here we show the waterproofed area during drying, ready for some levelling fill and then the new glue and tiles.
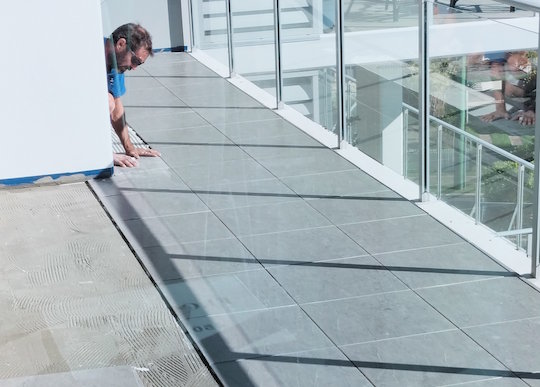
Three rows along the balcony edge are done on Day-4. Looking great.
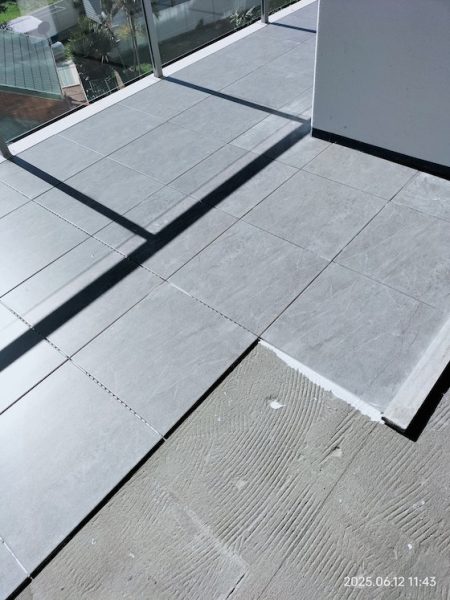
A closer photo of a completed area, ready for grout on Day-5.
As I post this article we are at the end of Day-4. Tomorrow will be the grouting of the tiles, which should be done by lunchtime. Then on Day-6 they plan to return to finish off with some sealant around all the edges. All in all it took less time than expected and the workmanship is great.
Should you want a quote for your balcony then the contractor we used was “Starsh”, and his phone number is 0431 165 919. He was recommended to us by “Tile Merchants” where we bought our tiles.
The thermostat on our original Fagor oven was proving unreliable. Time for a new oven.
We searched several stores and on-line and settled on a Westinghouse replacement (model WVE614SC).
As we did with our dishwasher, we found the new one at Good Guys.
We collected it at the North Lakes store. luckily it fit into our vehicle.
Installation WVE614SC
This is one item that needs a licensed electrician to remove the old one and install the new one. The unit has the wiring direct connected to a mounting block inside the back of the oven.
Upon removal of the old oven, we discovered a few discarded cigarette butts from the original installers. Thanks guys for being so messy.
The Sparky had to re-route the power wiring from one side of the back of the cabinet to the other and the new Westinghouse had it connecting on the left (when looking at the oven front). It is a tight fit, and there was not an extra 15mm between the back of the new oven, and the rear wall. Trying to install the new oven with its cable crossing over the supply to the cooktop meant the new oven would not push all the way back as needed. Re-routing the oven wiring solved that issue.
Our dishwasher has been failing to shut off the water supply when done washing. Luckily it has a over-full sensor that detects a high water level, and then pumps out the water in the base. The slow leak of water getting past the infill solenoid would cause an overfull condition about once per hour. To manage this, I would need to turn the tap off after each time we used the washer. And on again to do the next wash.
Time for a new dishwasher.
Hello Bosch SMS40E08AU
Looking around at many brands, we settled on the Bosch model: SMS40E08AU. This we bought at Good-Guys.
Installation is fairly easy. Once I had the new hoses and power fed through to the undersink cabinet, the new unit slid cleanly into place.
The old Fagor model went to the metal pile at the Clontarf tip.
Our original Fagor microwave oven has been loosing its heating power and taking longer to heat/cook foods.
We wanted a new one that would fit into the same space and match the built-in look of the old Fagor.
With the tip from Fiona and Ned, we started hunting for the Artusi models. They had replaced theirs some time back and it looked close to the original.
The one we found was the Artusi AMO31TK model. This was ordered from AppliancesOnline and due to stock shortages and shipping delays, it took nearly two months to arrive.
Installation
The installation instructions that came with the unit were minimal. They left out some important details.
After unpacking, we found 4 small plastic bits that were not mentioned anywhere in the manual. These turned out to be important, and NEEDED to be screwed onto the base of the new unit.
The oven came with a paper template, showing where the rear bracket needed to be screwed to the floor of the cutout space. Yes, you need to remove the existing one from the original oven and use this new bracket as it fits into a small slot in the back of the new oven.
The install instructions mention removal of all packing items and plastic. The important point here is that the new unit comes wrapped in a thin plastic wrap that covers the vents in the top of the oven. Be sure to peel all the plastic off so that vent holes are open.
Plug in the cord, switch on, then slide the new oven into place. You may need to jiggle it a little to ensure it connects properly with the rear support bracket. Screw the front hold-down screw in place, and you are done.
Several Owners have mentioned that they have had issues with shower doors within Waves. I know that we did in our unit.
I had three different tradesmen come and try fix our shower doors. The third time we got LUCKY
The problem was that the gap between the fixed glass panel, and the door edge began binding. that made a loud scraping noise when opening/closing the shower door.
Then it got so bad that the door would not close fully and water splashed out onto bathroom floor.
My take was that the shower door hinges had moved, and that caused the gap to close. This was also the conclusion reached by the first two tradesmen. They tried adjusting the door hinges, but that was only partially successful, and did not last long.
Third Time Lucky
The third tradesman called was quick to see the cause and the solution. I explained the efforts made by the previous two tradesmen and how that had not helped.
Number Three explained that the problem was that the fixed pane was the cause. It has slowly crept away from the wall and had closed the gap.
The fix was easy, and he refused to accept any payment for his attendance.
Below I share what needs doing and how to do it....
This shows the area after it has been fixed.
The fixed pane creeps away from the wall and closes the gap. Then it binds on the shower door pane.
It is best to remove the door before trying the step below. However, for your first try you may decide to skip this step.
Removing the door carefully does make the whole job simpler.
The silver plastic covers at the top and bottom hinges will simply click off with a small screwdriver.
Then you can use a bigger screwdriver to free the door pane, and carefully place it somewhere safe.
The plan is to move the fixed panel back toward the wall, by tapping it carefully whilst protecting the edge of the glass. You you not want to break it.
As mentioned above, it is easier with the door out of the way.
Use a soapy solution, or CRC or WD40, applied around the edge of the fixed panel. Be sure to lubricate both inside and outside the shower.
Next, use a sharp flat blade, such as from a Stanley box cutter or similar, to loosen the seal around the glass. The blade should be pushed into the joint between the glass and the plastic seal strip. Again, do inside the shower, and outside. This is done so the glass is able to be moved with the next step.
Use a piece of softwood, or several layers of towel to protect the glass edge. Then tap it lightly on its edge to have it slide back into its original place. Start with light taps. Use a rubber mallet if you have one, but still protect the glass edge.
This should result in resetting the gap to the shower door, and fixing the issue. I hope you can get the shower door back in place in one piece.
Disclaimer: This advise is given freely with no responsibility on the part of the writer.
Many would have heard the noise of site clearing of trees and house at 8 Sutton St from before 7am today following the removal earlier in the week of the house at 6 Sutton St. About mid-afternoon the excavator on site started heaping up debris which resulted in soil excavation and consequent dust. Contrary to the requirements of MBRC approval no dust suppression was in place and much dust drifted to our apartments.
I made a formal complaint to the Council this afternoon so if no dust suppression happens again please add to my complaint so MBRC take the appropriate action.
The BC Committee Chairperson accepted my offer of having the Approval Documents placed in the ground floor library for owners to peruse. Barry from Unit 11 has borrowed the envelope of the Documents.
I saw this boat trying to climb the foreshore this morning.
Interesting operation where they had a separate hydraulic motor driving the front and rear wheels. When in the water, the wheels retract similar to an aircraft.
The hydraulic motor stalled several times indicating that this was perhaps the first time they chose this method of retrieval.